
I first made this basket as a way to give a basket of goodies to a friend who had helped me with some graphic design work for my Etsy shop. His little girl has an owl themed room and I thought I'd tuck in some gift cards and canned goods for a family centered thank you gift. It is rather small but with fall just around the corner I thought it would make a great trick or treat basket. It would hold plenty of candy for a toddler or preschooler although I think anyone older than 9 will need to take the trusty pillow case to have enough room for the haul they want.
Exterior Materials:
(1) 11 x 15 inch linen
(2) 11 x 3 inch cotton
(1) 11 x 20 inch fusible fleece
5 coordinating fabric scraps - these can be quite small, you don't need much
Heat n Bond light
Straps:
(2) 11 x 6 inch linen
Lining:
(2) 11 x 10.5 inch cotton
(2) 11 x 10.5 inch fusible interfacing (I like Pellon lightweight)

You will need to print out the Otis the Owl pattern found here. The only parts you need are the body, tummy, beak and eye. You will need to trim 1/2 inch off the bottom of the body and the tummy so that it fits nicely onto your basket.

Making the exterior:
Stitch the right sides of the 11 x 3 cotton pieces to the 11 x 15 piece of linen along the 11 inch sides. I use a 5/8 inch seam allowance through the whole project but you can use whatever is best with your machine.

Press the seam toward the linen.

When you are finished you should have a 20 x 11 inch rectangle. Using a hot seam iron press the fusible fleece to the wrong side.

Top stitch along the linen, close to the seam.

Making Otis
Cut out your owl pieces and trace onto the Heat N Bond light.

Press onto the wrong side of your fabric scraps. Then cut out using the lines you drew.


Layer the owl pieces onto the exterior and iron on using a hot iron - NO steam (unless you want an elderly, wrinkly owl).
Stitch carefully around each piece. If you are new to appliques use a small stitch and a thread that matches the fabric you are appliqueing. Mistakes will be well hidden. Take your time! Stitching around curves is a pain in the you know what so go SLOWLY.
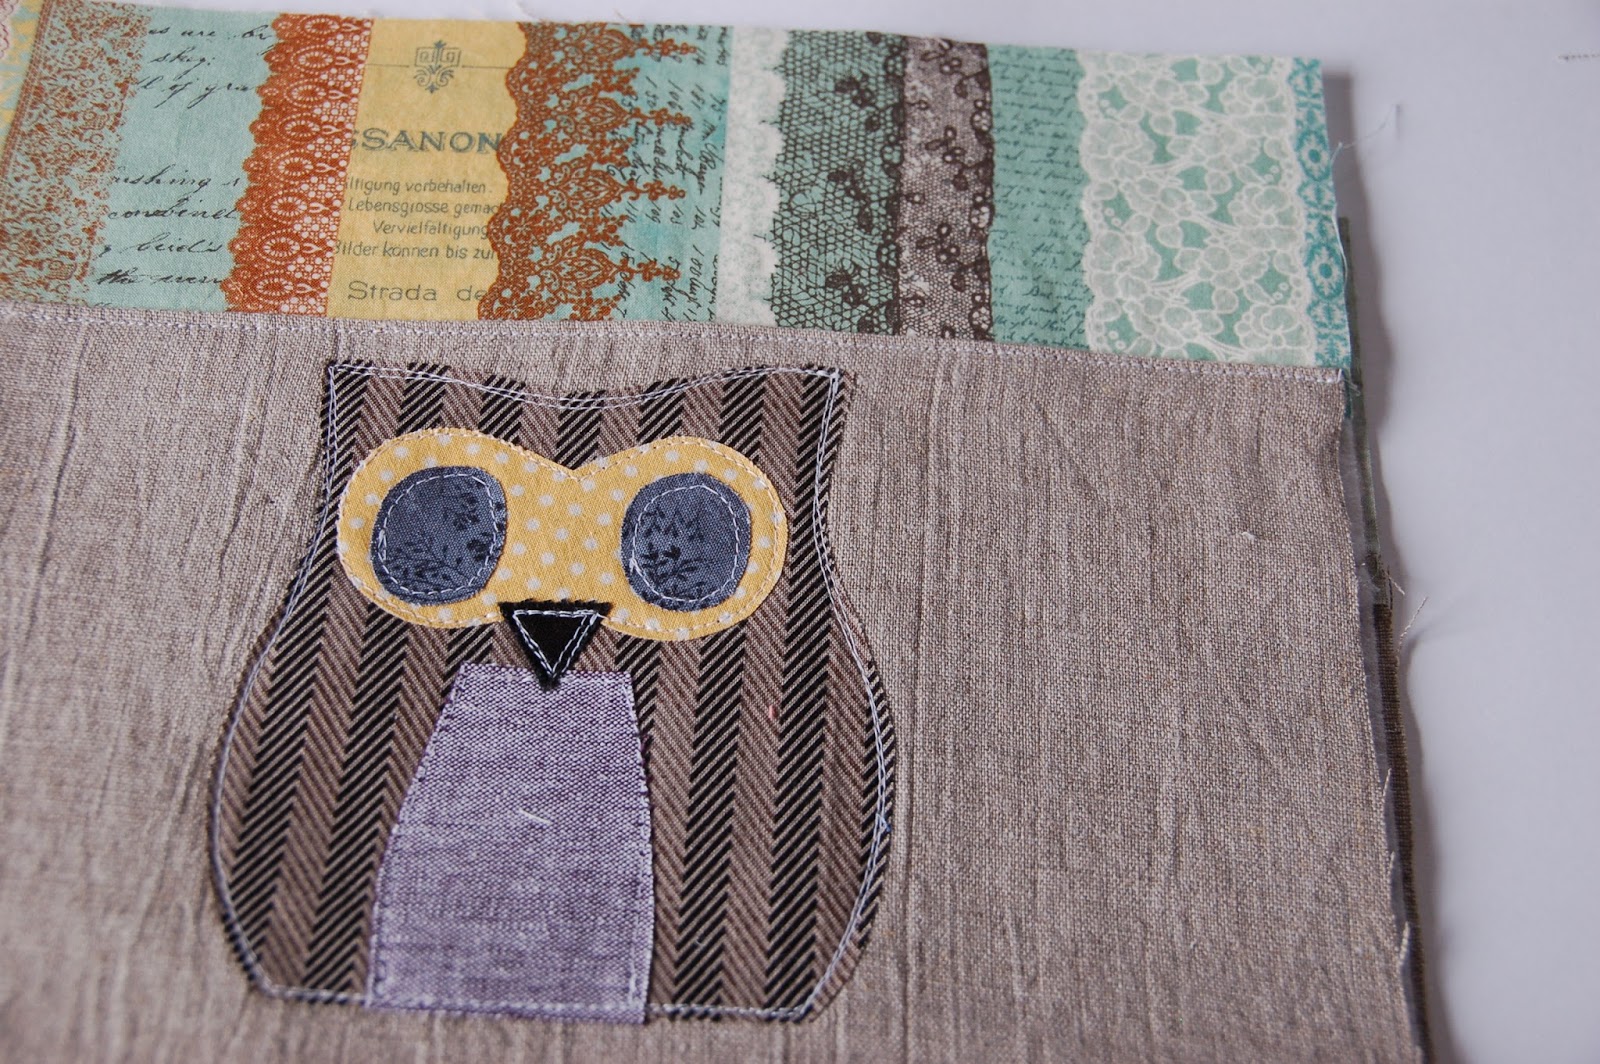
I went around this guy twice to make him stand out against the linen.
Make your straps.
Iron your 11 x 6 inch pieces in half the long way. I call it a "hot dog fold" ya'know, long like a hot dog bun. Press with a hot steam iron. Open and fold the edges in to the crease and press again. Then fold on the center crease. If you want you can put in a strip of interfacing on the inside for extra stiffness but it's not really necessary.

Stitch along the outside. Twice for extra strength.

Pin the straps to the 11 inch ends of the basket. The outside of the strap should be 2.5 inches from the outside. Pin in place. Be careful you don't twist the strap. Repeat on each side

Baste in place and remove your pins. I've forgotten this before :(

Pin right sides together and stitch along the raw edges only.

Square the edges. A cheaters way to a flat bottom! There is a great tutorial here for boxed corners.


Your finished with the exterior! Moving on........The lining is the easy part!
Iron the fusible interfacing to the wrong side of the cotton. Stitch with right sides together leaving the top 11 inch side completely open and a 3-4 inch opening on the bottom eleven inch side.

Box the corners exactly like you did on the exterior. Be sure to match the seams.

Your done! With the lining. Easy, right?
Do not clip these corners! They will add stabilty and bulk to the bottom of your basket.

Turn the exterior right side out. Leave the interior as is.

Tuck the exterior into the lining. Line up at the seams.

Pin securely at the seams and at each handle making sure they are pointed straight down.

Stitch all the way around.

Pull the exterior through the hole in the lining.

While the basket looks like this, close the hole in the lining. You can either hand or machine stitch. I'm lazy and do machine but I know a nice patient hand stitch looks amazing.

Tuck the lining back into the basket exterior, press, and now your done!

How cute are they!


